 |
| The next step in the process of building Ecobed 4 is to install the plumbing. The silicone has set and the filling, distribution and overflow system is now in place. The filler pipe has been attached to a timber packer using a galvanised saddle clamp. This arrangement keeps the filler pipe vertical. Next step is to test the integrity of the tank. |
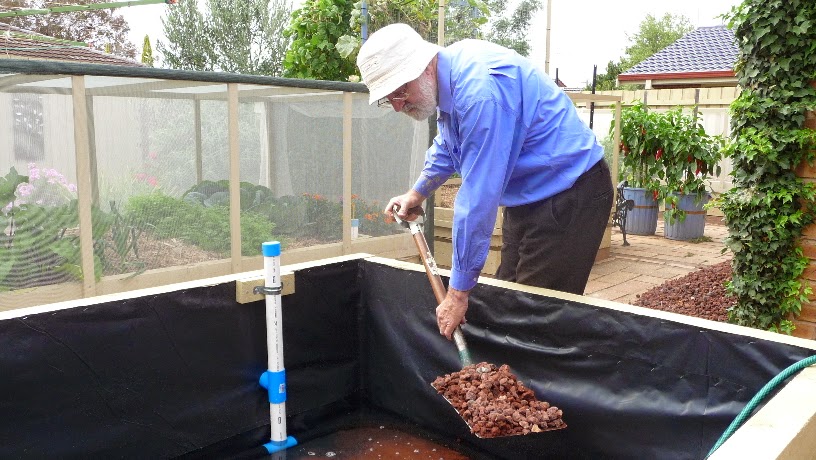 |
| As the water is added, I start to fill the tank with scoria. |
 |
| What a calamity!!!! the tank started leaking at each corner. After searching for the source of the leaks, I realised I had folded the corners incorrectly. Neat as they looked, I had allowed the vertical edge to go to the bottom of the bed with the vertical edge folded over it. This left a pahway for the water to find its way out of the tank. I should have made the horizontal edge continue to the corner and then fold the vertical edge over it as shown above. This kept all the edges of the sheet above the water line, and fortunately it only took a few minutes to fix. |
 |
| With all the scoria in place, I am using the filling system to bring the water level up to the scoria's surface. Doing this allows you to accurately spread the scoria, level with the surface of the water. |
 |
| This heavy duty shadecloth provides a barrier to keep the soil out of the water tank. It comes in a 3m x 1.8m roll, which provides a slightly bigger overlap than needed, but there's no point in trimming it back. It works fine as it is. |
 |
| Bringing the soil back from my front lawn. |
 |
| Fitting part of the barrier for the Ecobed's worm farm. This photo provides a good view of the overflow pipe emerging from the Ecobed's wall. When I fill the tank, I usually wait for water to run out of the overflow pipe into a collection tray before I turn off the water supply. This surplus water is used where its needed. |
 |
| Here is the completed worm farm. The gap between the water tank and the bottom of the worm farm will be full of soil, giving the worms free access to and from the growing area. Its a feeding station rather than a worm farm really. The Water level indicator has been made and installed for use. It's painted yellow and marked with 2 black rings showing the water tank's full and empty levels. You can see the tank empty mark at the top of the indicator in the photo. The cap keeps insect pests out of the tank, and a 7mm hole in the top of the cap guides the indicator up and down the filler tube as the water level rises and falls in the tank. |
 |
| This photo shows how the water level indicator is made. It is a piece of 5mm diameter Tasmanian Oak dowel clamped in a vice with a table tennis ball attached to one end. I use a large blob of clear silicone sealant, which is "feathered"over the bottom of the ball and down the timber shaft to improve the contact area and adhesion. The ball acts as a float and is a neat fit in the filler tube. This device when painted yellow with black indicator rings, provides a "see at a glance" indicator of the tank's water level. |
 |
| Here is the finished bed with 60mm of homemade compost covering the soil and about 50mm of sugar cane mulch on top. It should be ready to plant in about 4 weeks, and by then I will have made and fitted the pest exclusion frame and encircled the bed with a snail and slug exclusion tape. |